Embedding Media
LAB TIME: 10 MINUTES
ADDING OUTSIDE <IFRAME> MEDIA TO COURSE ITEMS

|
IntroductionEmbedding a YouTube video is the most efficient way of sharing videos on web pages, including in CNM Learn. You don’t need to be a web designer or developer to do it either! Also, by learning how to embed a YouTube video, you will be able to use the same process for any other <iframes> on the web to include a variety of multimedia for any online course.
|
Step One: Find a VideoGo to YouTube and search for the video you want to use.
Click Share underneath the video. A new panel will drop down with three options: Share, Embed, and Email. Click Embed in the new panel. The first piece will be a code in a box which begins with iframe. Clicking Show More will reveal additional options. |

The iframe code is located under Share > Embed beneath each video on YouTube.
|

Click "Show More" to reveal additional settings. You can set the video size and enable/disable suggested videos.
|
Step Two: Pick Video SettingsBeneath the code box will be a video preview.
Next is a drop-down (show more) menu to pick the video size. The default 640x360 works very well for CNM Learn. If “Show suggested videos when the video finishes” is checked, uncheck it. Leave “Show player controls” and “Show video title and player actions” checked. *YouTube update: Any video viewed in Google Chrome will now automatically play as an HTML5 video so additional steps have been removed from this lab. |
Step Three: Pasting into CourseGo to the destination course in CNM Learn for the video. Open Learning Modules and the appropriate module the video belongs in. Create a new Item for the module.
In the content editor, click the HTML button to the far right. A new window will open.
|
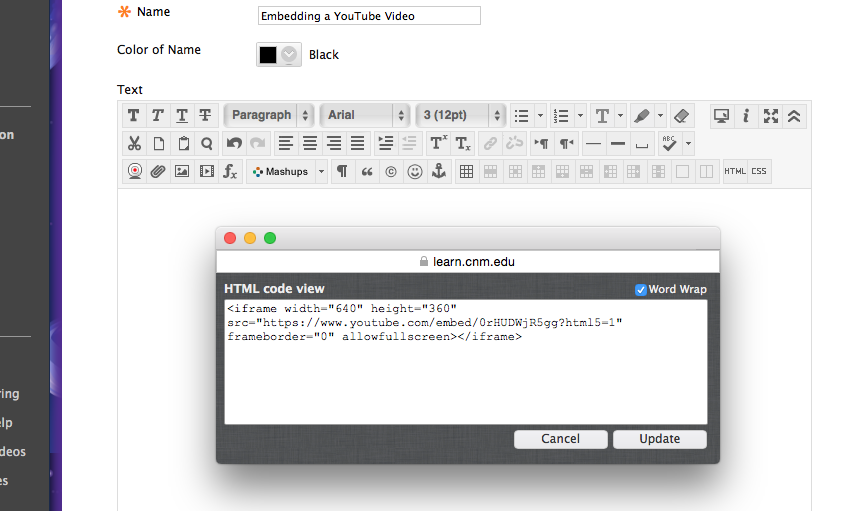
Copy your embed code from YouTube. Go to your course and click the HTML button in the Content Editor. Paste the embed code to add your HTML5 video.
|
Paste the embed code you copied from YouTube in the HTML Editor window. When you have finished click Update at the bottom.
A yellow box will appear in the content editor, meaning your embedded video has been added. Now click Submit. Go to Student View and preview the video.
A yellow box will appear in the content editor, meaning your embedded video has been added. Now click Submit. Go to Student View and preview the video.
You can embed any embeddable object with the HTML code view inside CNM Learn. You can use this for Items, Discussions, and even Announcements. There are more options than just video. Try experimenting with new tools so your course is engaging and interactive for students. Check out some of our tool suggestions below.
Go Beyound Video: Make InteractionsThere are plenty of web resources to make interactive embeddable content!
Northwestern University's Knight Lab has many tools for you to use for free:
You can also make embeddable infographics with a free Piktochart account. |
JUXTAPOSE: SOCHI SURE HAS GROWN!
|
Don't Reinvent the Wheel: Grab Learning ObjectsGrab biology, chemistry, and physics examples from Molecular Workbench.
Need some 3D? Sketchfab and NASA are just a few 3D repositories you can find content from, or make your own with Autodesk's 123D Catch. Learn more about photography and 3D models in Mobile Imaging. Annenberg Media and MERLOT both house large collections of reusable learning objects. Just make sure you do not use any with Flash content so all your students can easily interact with the embedded object! |
